- Home
- Resource Center
- Russian Visa Application Instruction Guide
Russian Visa Application Instruction Guide
Russian Visa Application Instruction Guide
Click here to download as a PDF.
Step 1: Invitation/Voucher Verification
Before completing the application online, please consult your account manager to verify you have a valid ‘Tourist Support Voucher’ or a valid ‘Russian Business invitation’. These invitations come in various forms and NOT all are created equal. Some invites may require translation from Russian to English, while some business invites may NOT be eligible for expedited service. Your account manager can assist you in deciphering your invitation. If you already have an invitation, we strongly suggest you obtain a Russian translation from the issuing entity, to ensure the most expedited turn around of your visa. If you do not have a voucher or invitation, we can assist in obtaining one for you, please consult your account manager.
To learn all about Russian invites click here:
https://www.passportsandvisas.com/images/uploads/applications/Russia_Invitation_Guide.compressed.pdf
Step 2: Consular Website
Once your invitation is verified and you have the needed technical information, please visit following link to complete a Russian Visa Application:
https://visa.kdmid.ru/PetitionChoice.aspx
Step 3: Intro Page
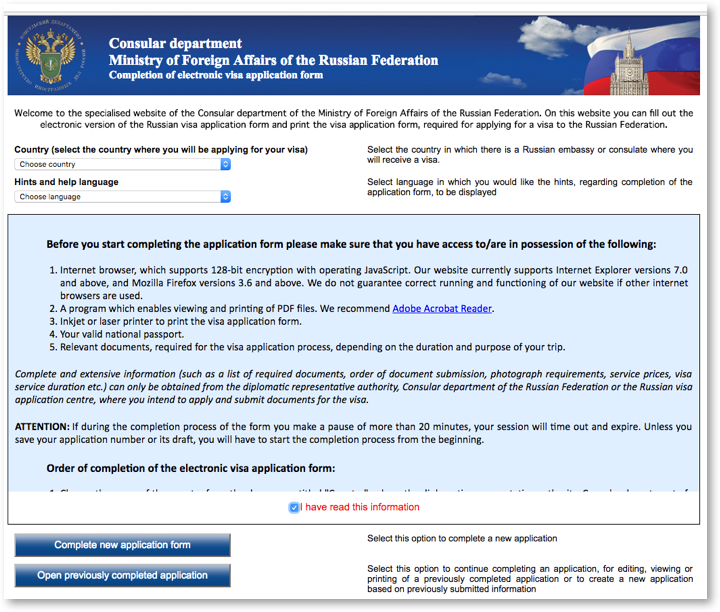
Once your invitation is verified, please visit the the Russian website (pictured below). You will see two drop down menus with titles reading ‘Country (select the country where you will be applying for your visa)’ and ‘Hints and Help Language,’ please make sure to select the United States and English for the respective fields. Once this is complete, please read the disclaimer in the light blue colored window and then click “I have read this information”.
You will then click the button titled ‘Complete new application form’ towards the bottom left of the screen.
Step 4: Create Password
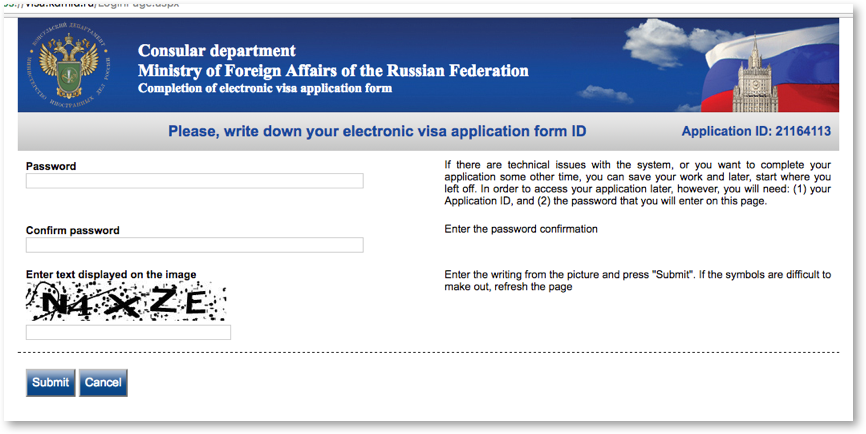
On the following screen (pictured below), you will be prompted to create a password. We strongly recommend keeping this password simple. To help expedite your application, please set your password to your last name followed by “123”. Example: Smith123
Next, enter the verification code, displayed in the image, in the box provided. This is case-sensitive.
Then click “Submit”.
Step 5: Application Form ID Number
On the next screen take note of the application form ID Number (pictured below), then click on “Next”. Note for every iteration of the application that you edit, a new Application Form ID will be generated.

Step 6: Application (Visa Details)
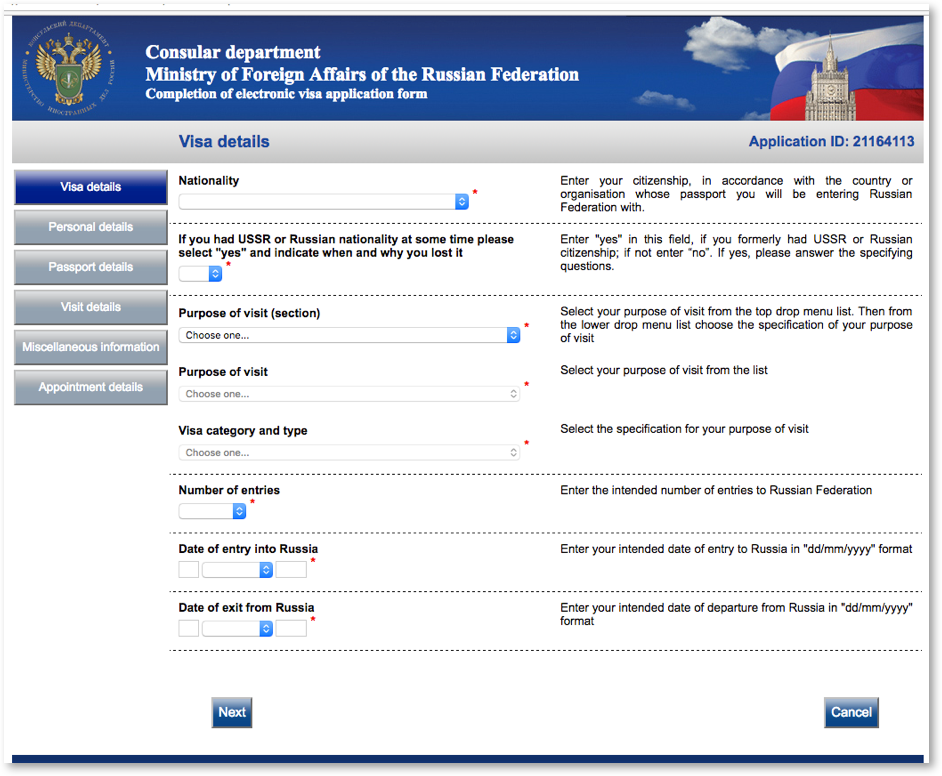
Fill out as instructed.
Note: If you were born in Russia or have any ties to Russia, please consult your account manager immediately.
- For “Purpose of visit (section)” you may select Tourism or Business Visits depending on the the reason you’re visiting Russia.
- For “Number of Entries” you must select the same number of entries as outlined on your Russian invitation or voucher.
- For “Date of Entry and Exit” this must match your voucher exactly.
Step 7: Application (Personal Details)
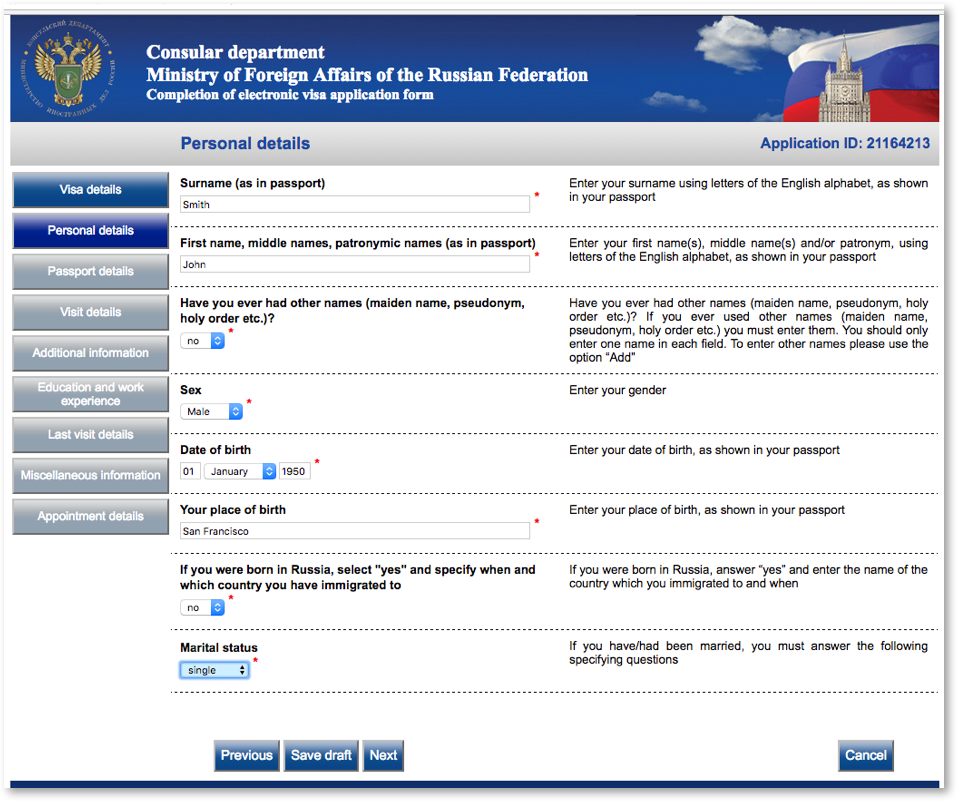
Fill out as instructed. Note “Surname” is you last name.
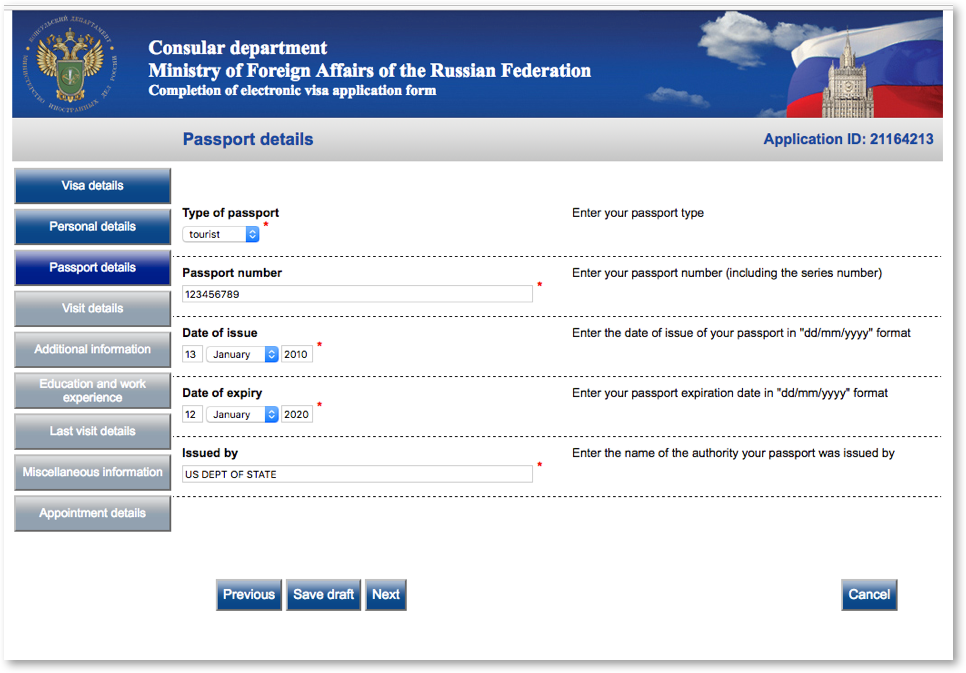
Step 8: Application (Passport Details)
Fill out as instructed. Important: Your passport is a “Tourist” passport NOT an “Official” Passport. Official passports are for Official Diplomats.
Your passport number is located on the top right of your passport information page. Please ensure the dates of issue and expiration match exactly as it appears in your passport. NOTE: A Russian visa can only be valid up to exactly 6 months before the expiration date of your passport.
Step 9: Application (Visit Details)
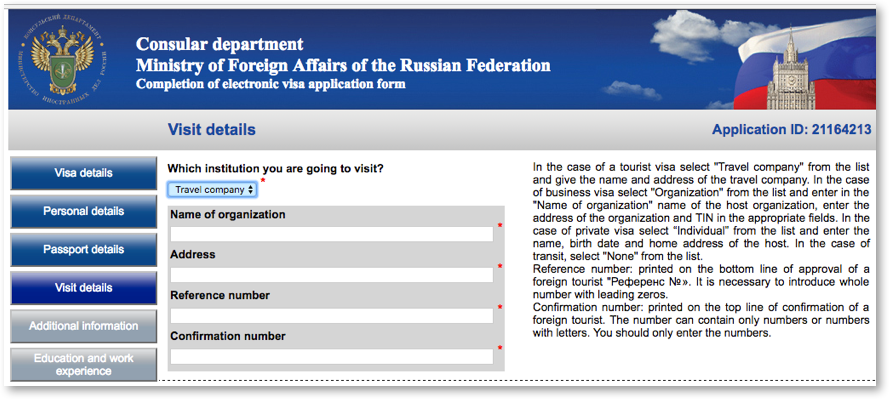
This is the most important section pertaining to your invitation/voucher. The page may look different depending if you’re applying for a Tourist or Business visa. Please see below.
If you’re applying for a Tourist visa, the website will display “Travel Company” (see below). This information is found on your “Tourist Support Letter” also known as a “Voucher” or “Invitation”.
The name of the organization is often preceded by the letters “OOO”. The Reference Number is often preceded by the letters “MBT”. The Confirmation number is usually located at the top of the voucher. Your account manager can verify information on your Tourist Support Letter.
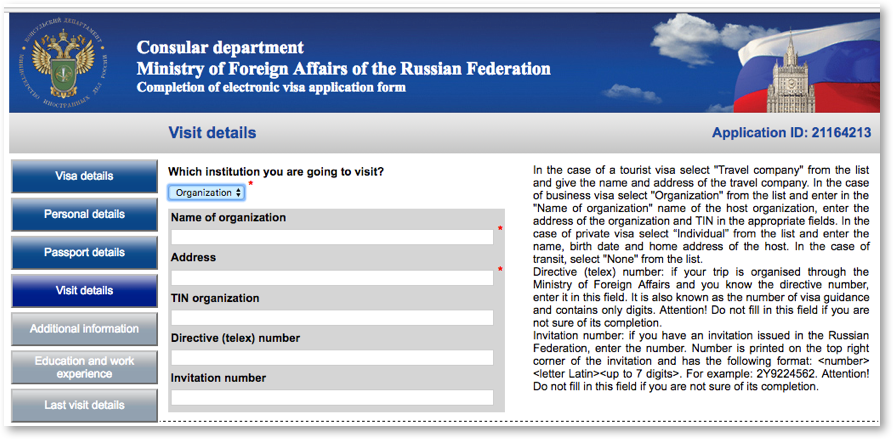
If you’re applying for a Business visa, the website will display “Name of Organization” (see below). This information is found on Russian Business invitation.
Depending on the type of invitation you have you will need to input the information in the proper field. Please consult your account manager.
Step 10: Application (Additional Information)
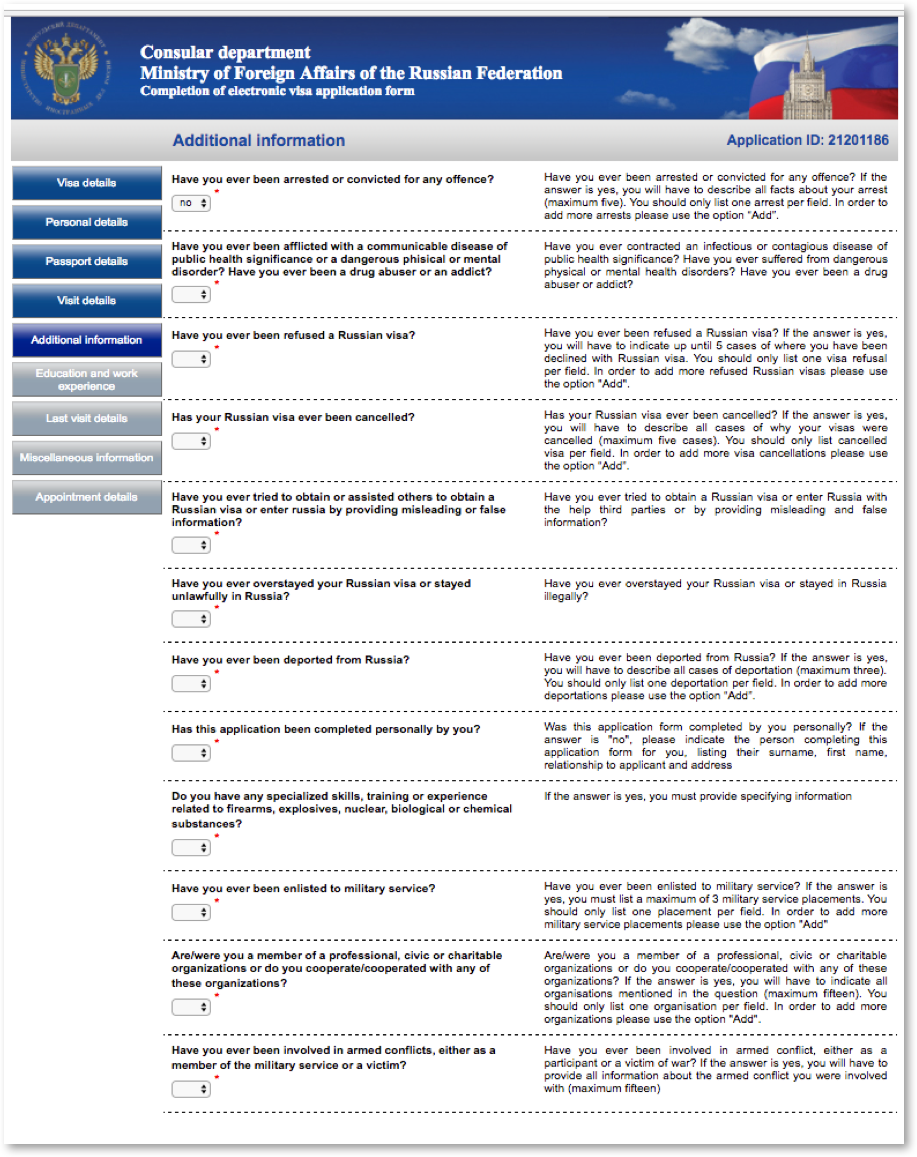
Please answer the questions in this section truthfully and honestly. Please note that the Consulate has complete discretion over the issuance of any visa based on how you answer these questions. Please note: Additional documents may be requested of you by the Consulate after submission.
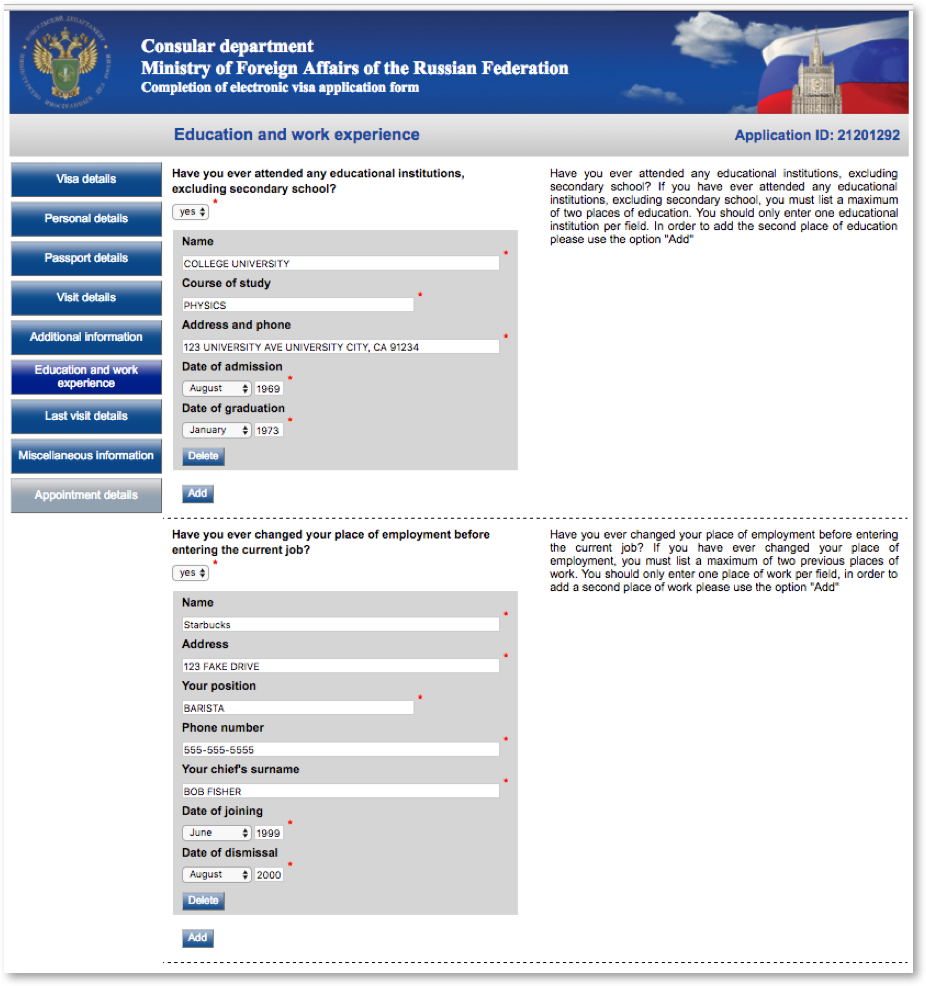
Step 11: Education and work experience
Important: All addresses and phone numbers must be complete, including city, state and zip.
For clarification, the employment section is asking for any PREVIOUS employment you’ve held other than your current occupation.
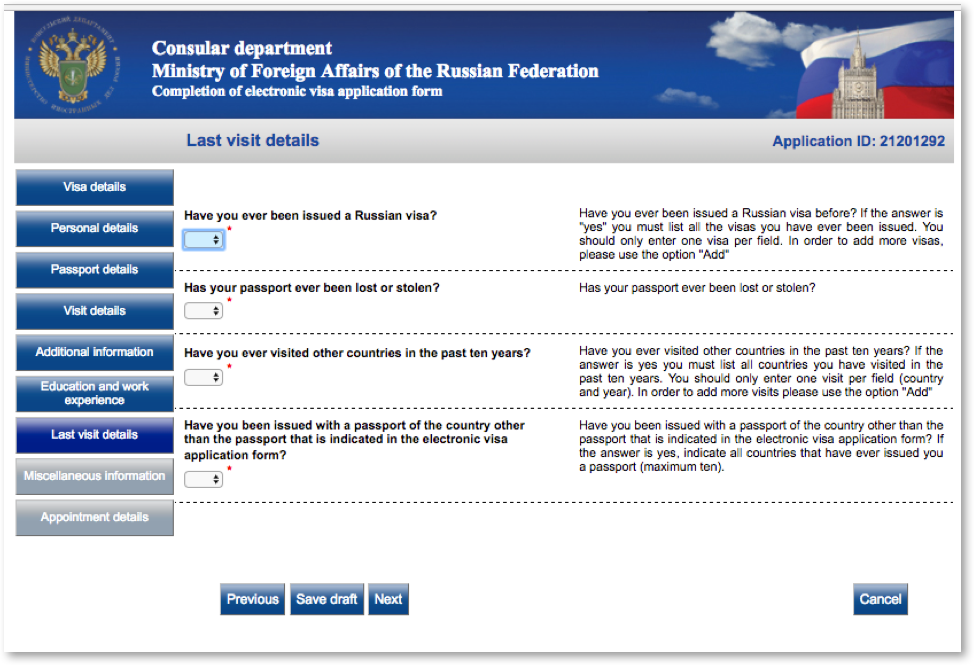
Step 12: Last visit details
Please answer this section to the best of your ability.
If you have been issued a Russian visa in the past, but do not have it in your possession, please fill it out to the best of your knowledge.
If your passport has been lost before, you MUST answer “Yes”. The back of your replacement passport has a note that you’ve lost a previous passport.
Please list as many countries as possible that you’ve visited in the last ten years. If you are a frequent traveler, please list the last time you’ve been to each country. The last 10 countries will suffice.
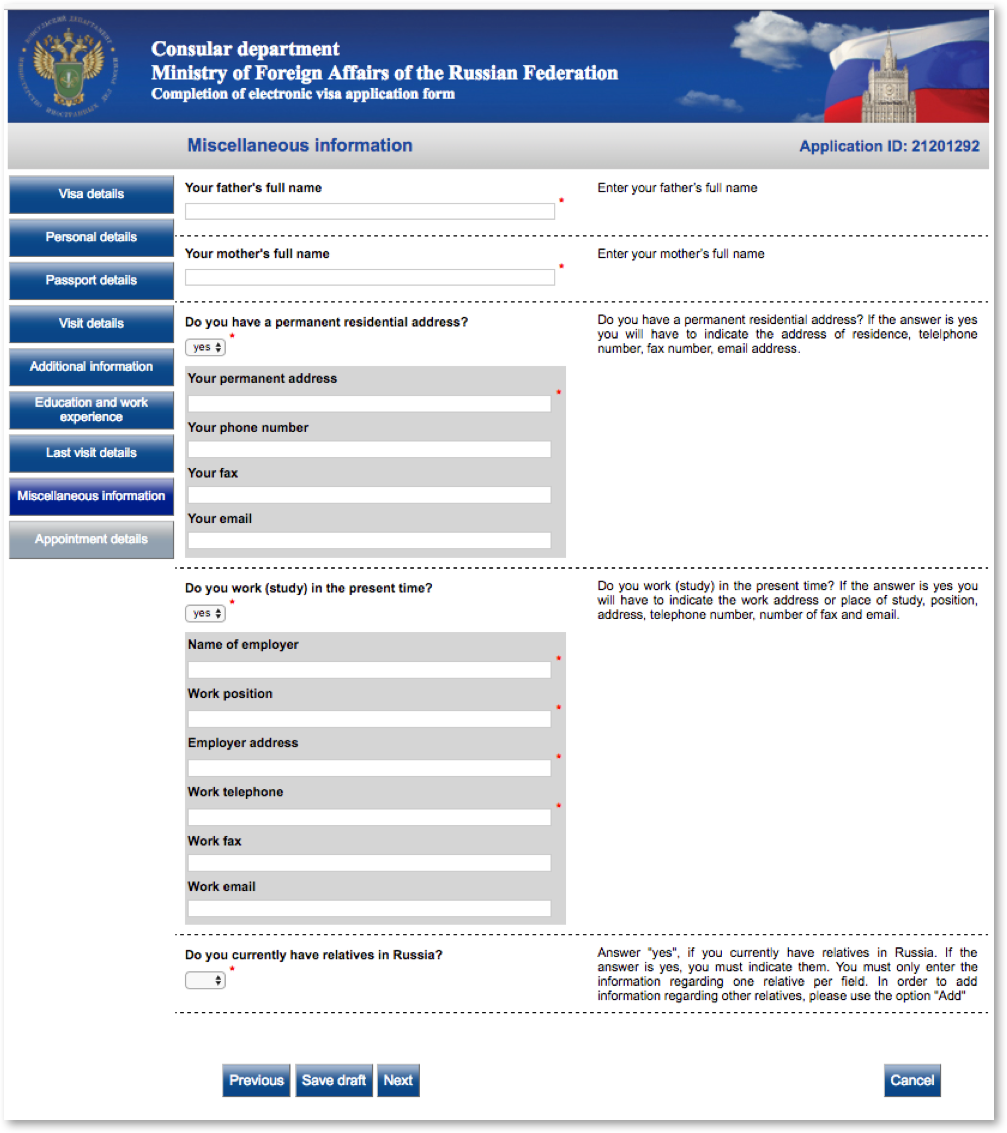
Step 13: Miscellaneous information
Parent’s full names are mandatory. Please fill out your permanent residential address including city, state, and zip code.
If you’re currently employed or in school, you must list the full details of your employer/school in the fields provided. If you are retired or a stay-at-home spouse, you can list your home address and list you're the “Name of employer” as “Retired” or “homemaker”.
If you have relatives in Russia, please list them in the space provided.
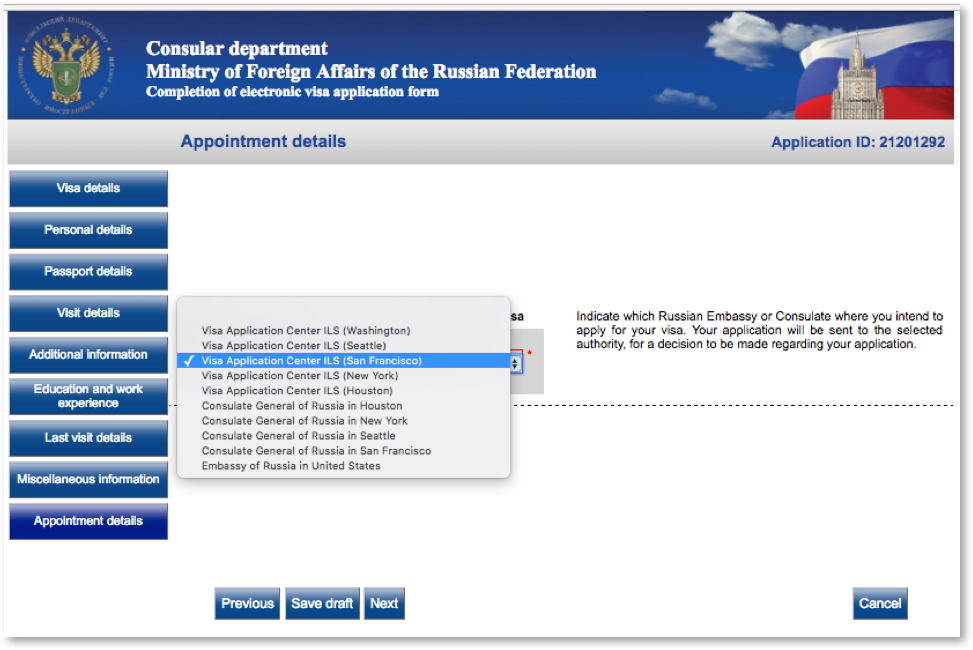
Step 14: Appointment Details
The valid choices in this section begin with “Visa Application Center ILS…” Please confirm with your Account Manager which Visa Application Center your application will be sent to.
Note: Some invitations may require your application to be submitted to a specific Consulate. Please consult your account manager.
Step 15: Information Confirmation
This screen will allow you to verify your answers before finalizing your application. Please take this time to review your application. In case you miss something here, you WILL be able to edit your application should you need to correct the mistake.
Once your satisfied, click on “Save and Submit” towards the bottom left of the page. You will be able to print your application on the next screen.
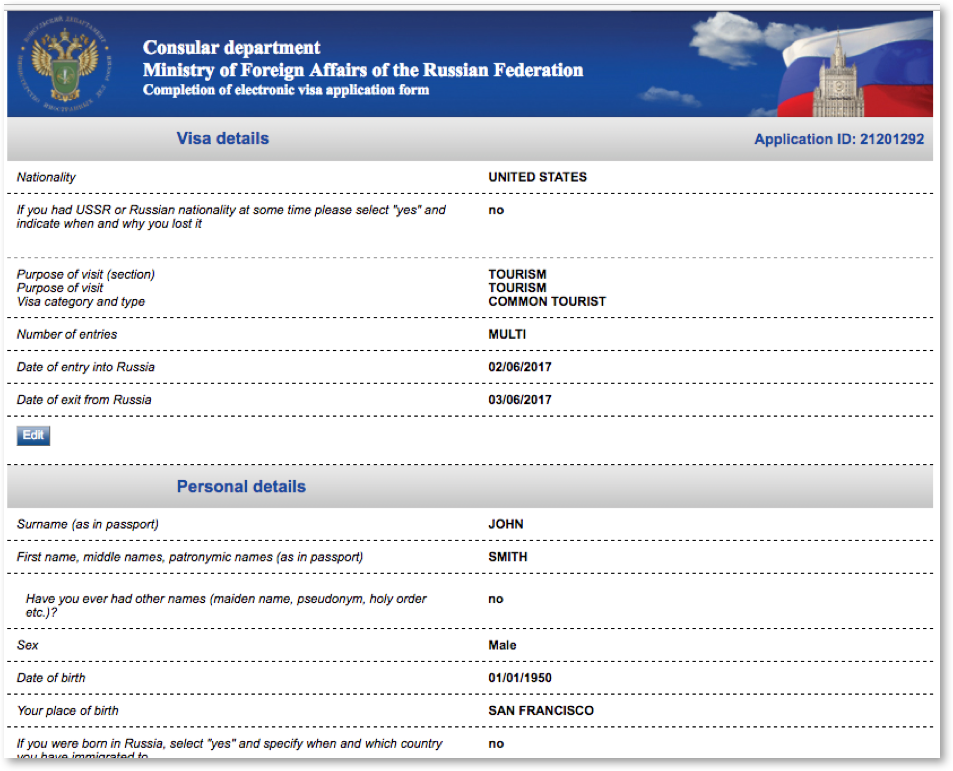
Step 17: Printing your application
On this screen, please choose “Print Letter” towards the bottom left of the screen. This will automatically save your application as a printable document. The file will be saved automatically to your “Downloads” folder of your computer.
The file name will be look something like this: Application21201292.pdf
Please email this application to your Account Manager for final review.
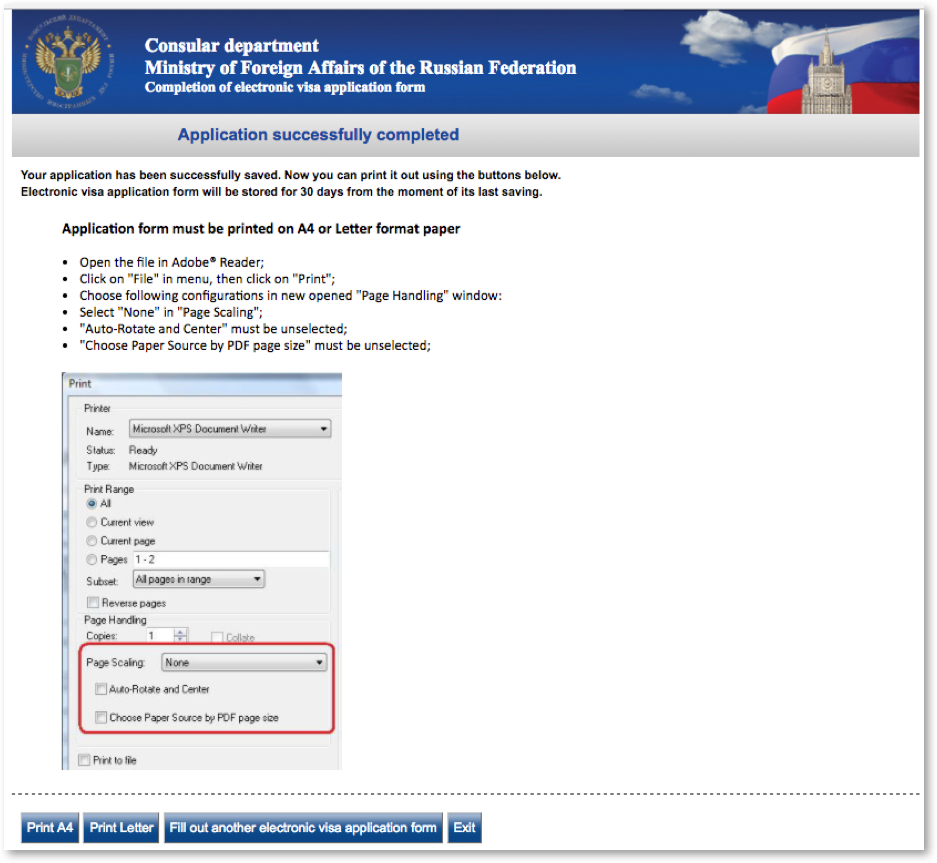
Step 18: Signing your application.
The average application will be 3-4 pages long depending on how many questions are answered.
Please sign and date on the first page, towards the bottom left.
SAMPLE APPLICATION:
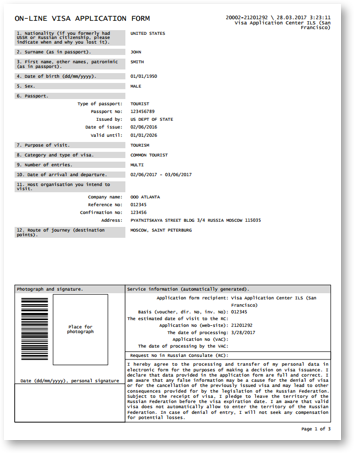
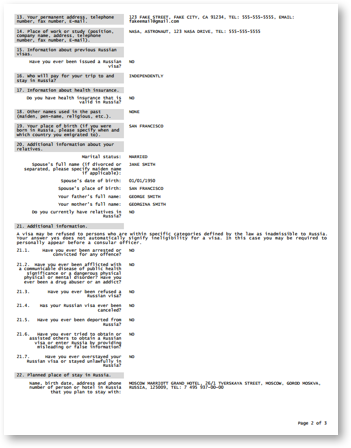
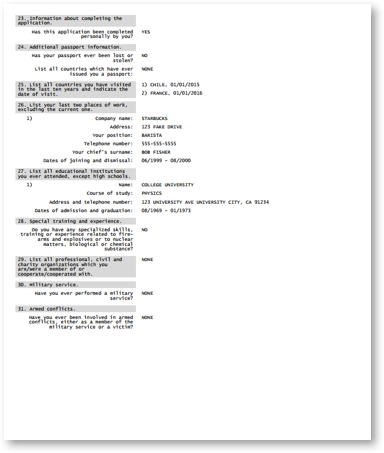
*Screen shot photos have been borrowed from the Consular department of MFA of Russia
Tags: Russian Visas | Visa | Russia
Answer two questions and we'll show you if you need a travel visa or passport for your upcoming trip


